Your cart is currently empty!
Re-Working the Nursery Closet
One of the very first things we tackled after moving in was the nursery was the closet. The nursery actually has two closets – a regular full-sized closet and an attached smaller linen closet. Our house was built in the 70’s and by today’s standards that means our closets are considered small and storage space is limited.
I’d agree.
In fact…both apartments we lived in previously had more closet space than we do currently. So while we’re lucky to have 2 closets in the nursery, the closets themselves lacked a lot of functionality and I knew that with a few tweaks, they could offer much more storage space that our growing family desperately needed.
After the holidays I was especially feeling a little overwhelmed and a lot over indulged. Since it was Emie’s first Christmas we were inundated with gifts and I found myself getting overwhelmed with where it all would go. Luckily, it’s the perfect time of year to start fresh and purge all the crap out of our house and thankfully our nursery closet was already set up for success – keep reading to see all the changes we made to make this a more functional part of our home.
Here’s the nursery closet right after we demoed the floor and all the trim:

The closet wasn’t set up in a way that maximized the available space so we decided to tweak the set up a bit so that we could add shelving for bins and baskets on one side and hanging space on the other side. Because if you know babies, you know that they come with so.many.things. and all those things need a place to live.
We decided to add shelving to the left side of the closet because 3 hanging rods just wasn’t necessary for one tiny baby. Adding shelves to the left side would make room for bins of baby essentials (blankets, bedding, diapering supplies, etc.) plus a hamper down below for the massive amounts of laundry that babies make on the daily. On the right side we planned to keep the 2 existing hanging rods but decided to add a shelf just above the lower rod for even more storage space. #neverenoughstorage

Once we demoed the closet, we gave everything a fresh coat of paint – SW Tricorn Black. The ceilings too! One of the things that really bothered me most about the closets wasn’t even their size – it was how beat up and dirty they were. Giving both closets a fresh coat of paint made all the difference. I no longer cringed at the thought of putting little baby clothes inside…in fact, I looked forward to it!

After the closet had been painted, we used our hamper as a guide (or 2 poufs stacked on top of one another) to help determine how tall we wanted each shelf. We settled on 3 shelves at a height of 16″ each – the perfect height for a few fabric bins.
The closet wasn’t framed out with any millwork when we moved in but at the last minute we decided to add some trim around the perimeter and it was easily the best decision we could’ve ever made for this room.
Here’s the closet before trim:

And here it is after trim:

Bad photo, but so much better, right? Adding trim or millwork can easily elevate a room and make it look much more expensive without being expensive. It’s my favorite way to update a room on the cheap!
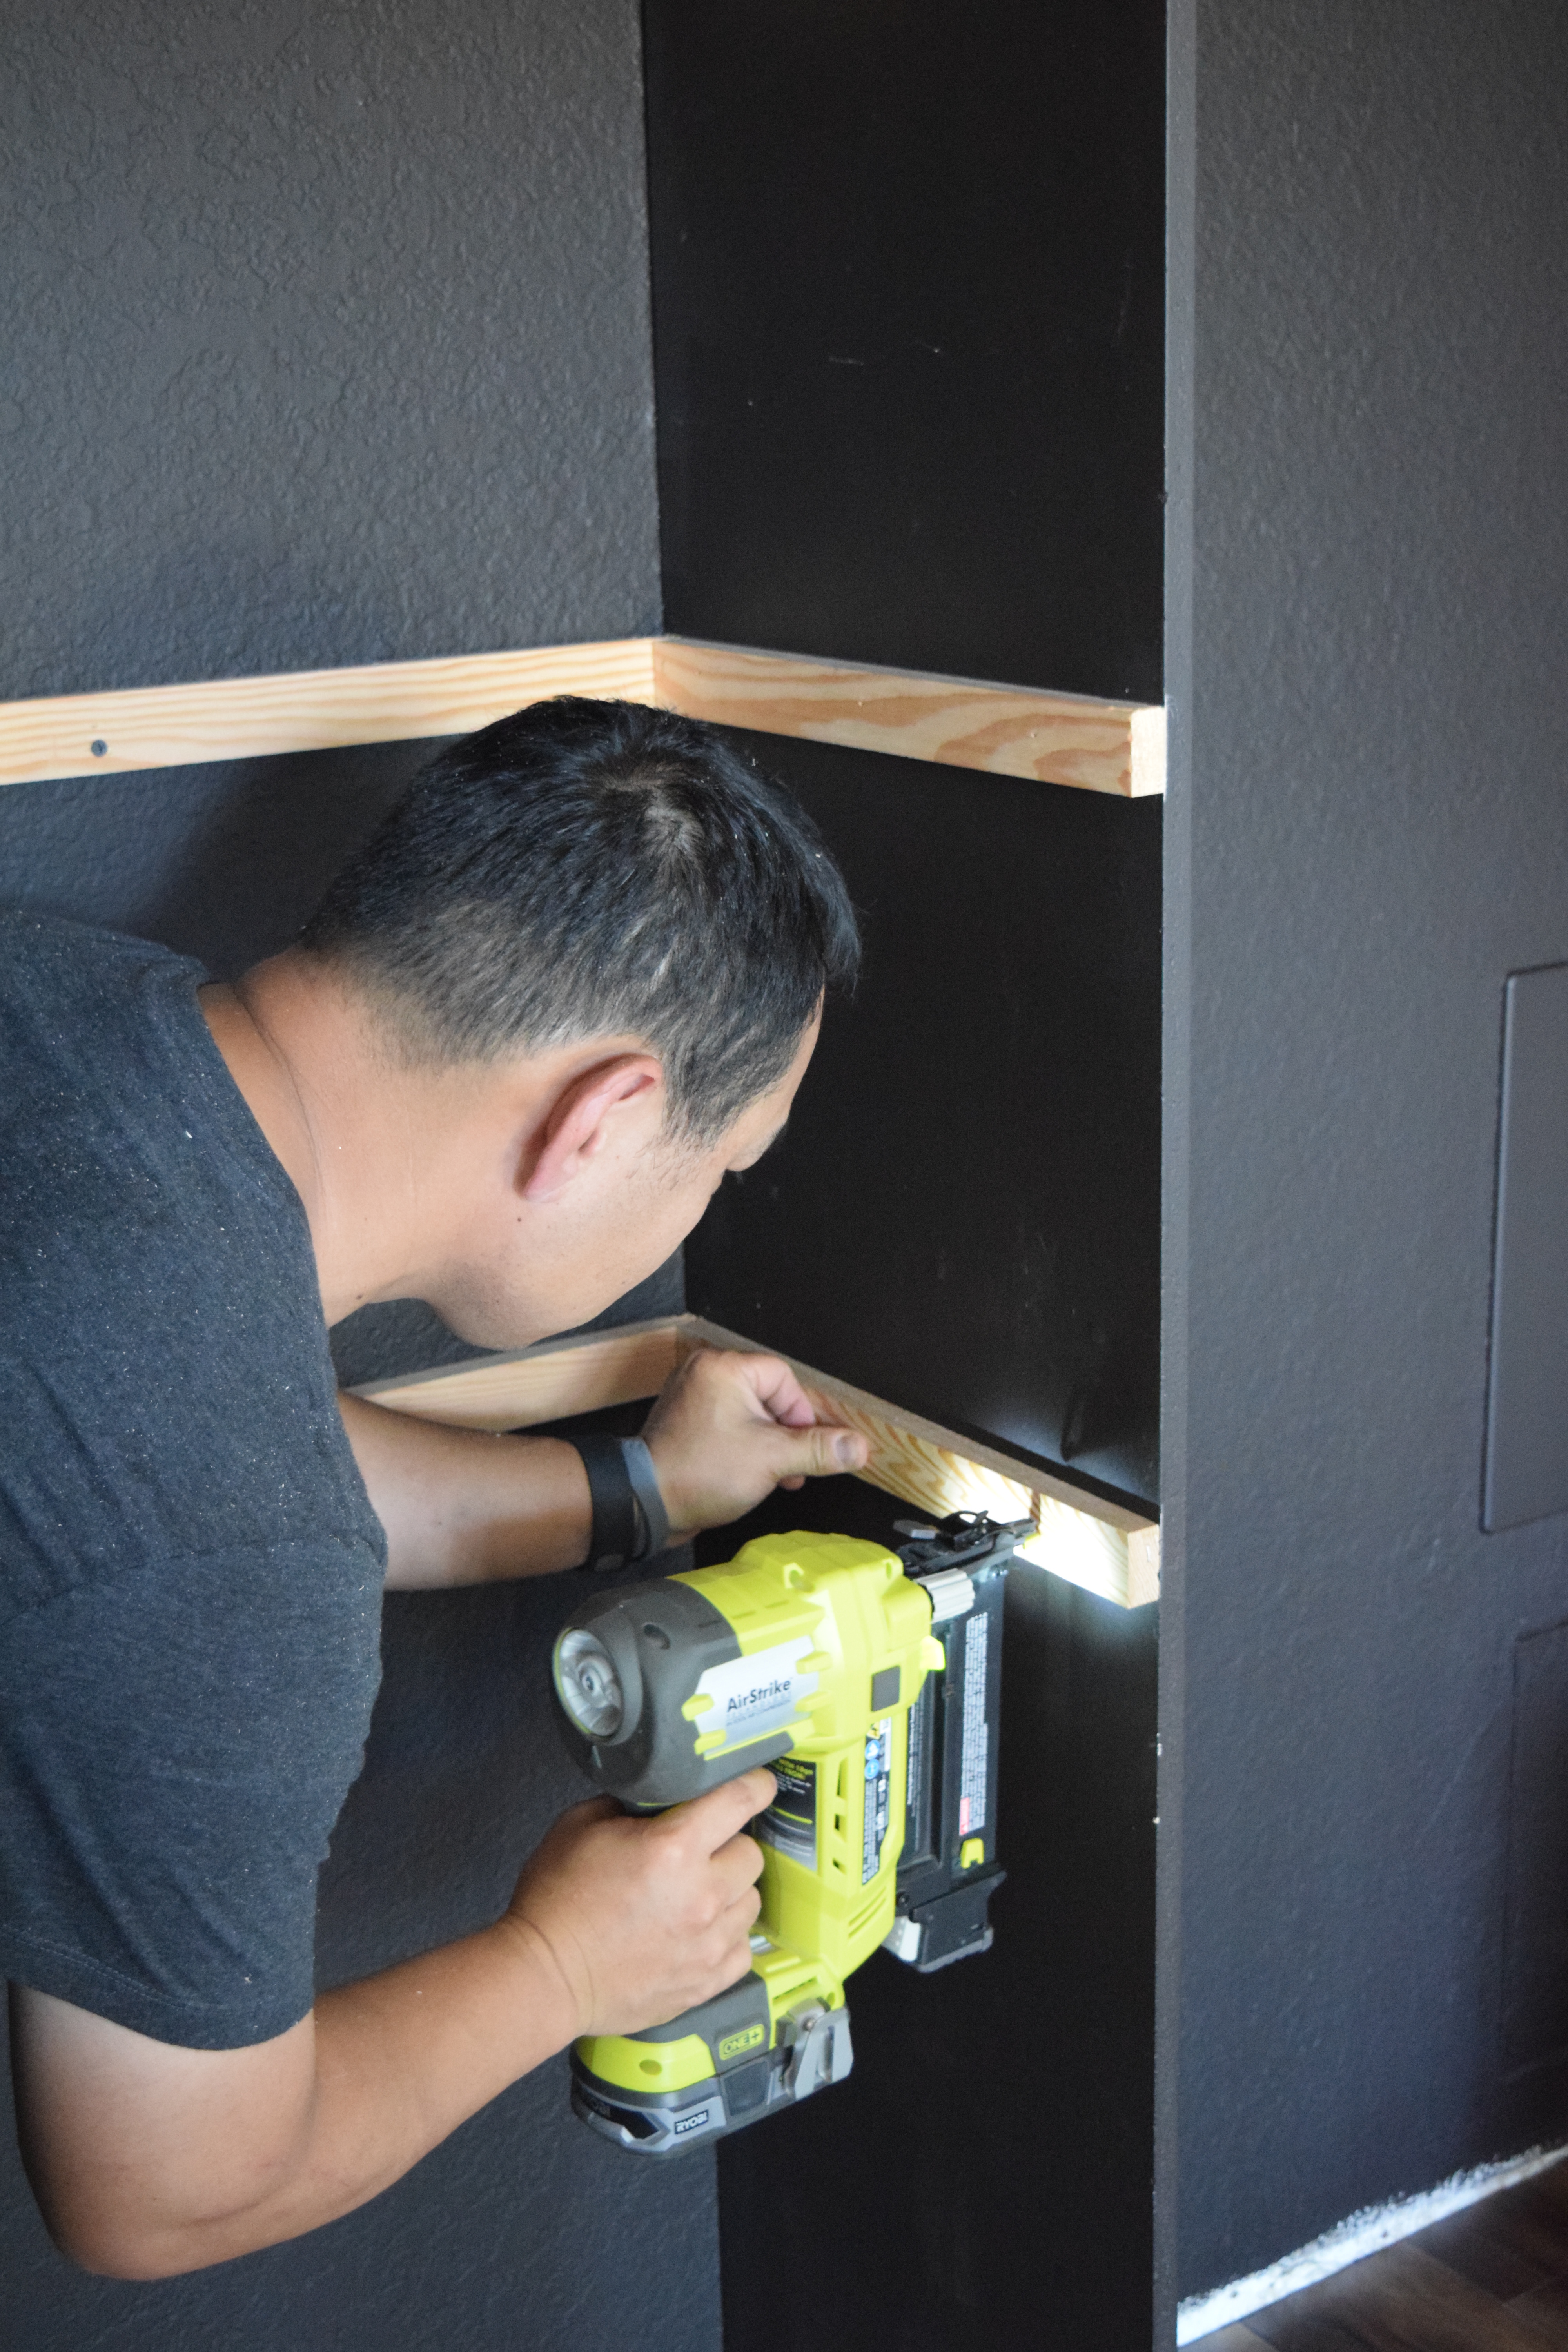
To make the shelves, we used cheap 1×1 pieces of wood for the shelf supports making sure to secure them into studs around the perimeter of the left side. With the shelf supports in place, we measured and cut each shelf to length – no two shelves were the exact same size and nailed them into the shelf supports from the top.

We installed the shelf supports flush with that dividing wall in the middle of the closet and then trimmed out the face of the shelf with inexpensive 1×2 strips of wood for a finished look. Once the supports were installed, we painted them SW Tricorn Black to blend in a disappear.


For the right side we installed 2 closet rods, making sure to add wood backers along the perimeter of the right side so the rod brackets had something to screw into and the shelf above the lower rod had something to rest on. I decided to upgrade the basic wood closet rods to these gold closet rods I found on Wayfair.


I actually ordered the longest rod they carried and cut it in half using a hack saw because it ended up being cheaper than purchasing 2 rods the correct length. The metal rods really elevated the closet and made it look super expensive without actually being expensive. Plus the hangers slide much better across the metal rods than they ever did on the wood ones. I’ll definitely be adding these to our closet when the time comes!

Now that you know how we re-worked the nursery closet, I’ve got another post coming to go over how we organized it – which was especially helpful to store all the goodies Emie received over the holidays!
Are you tackling any closet project in the coming year? We have 5 additional closets and most of them all of them are in horrific shape – so here’s hoping a few more can look as good – and work as well – as this one does!
2 responses to “Re-Working the Nursery Closet”
The closet came out great, thanks for sharing.
Glad you liked! Thanks for stopping by!