The bathrooms in our house were functional but they were far from pretty so when I had some time off from work a few weeks back, I decided to tackle a project I’ve never done before: painting our tile floors.
We have this tile (not sure what material it is exactly) in several places throughout the house: the entry, fireplace, guest bathroom, and main bathroom and to say I dislike them would be putting it mildly – I loathe them!
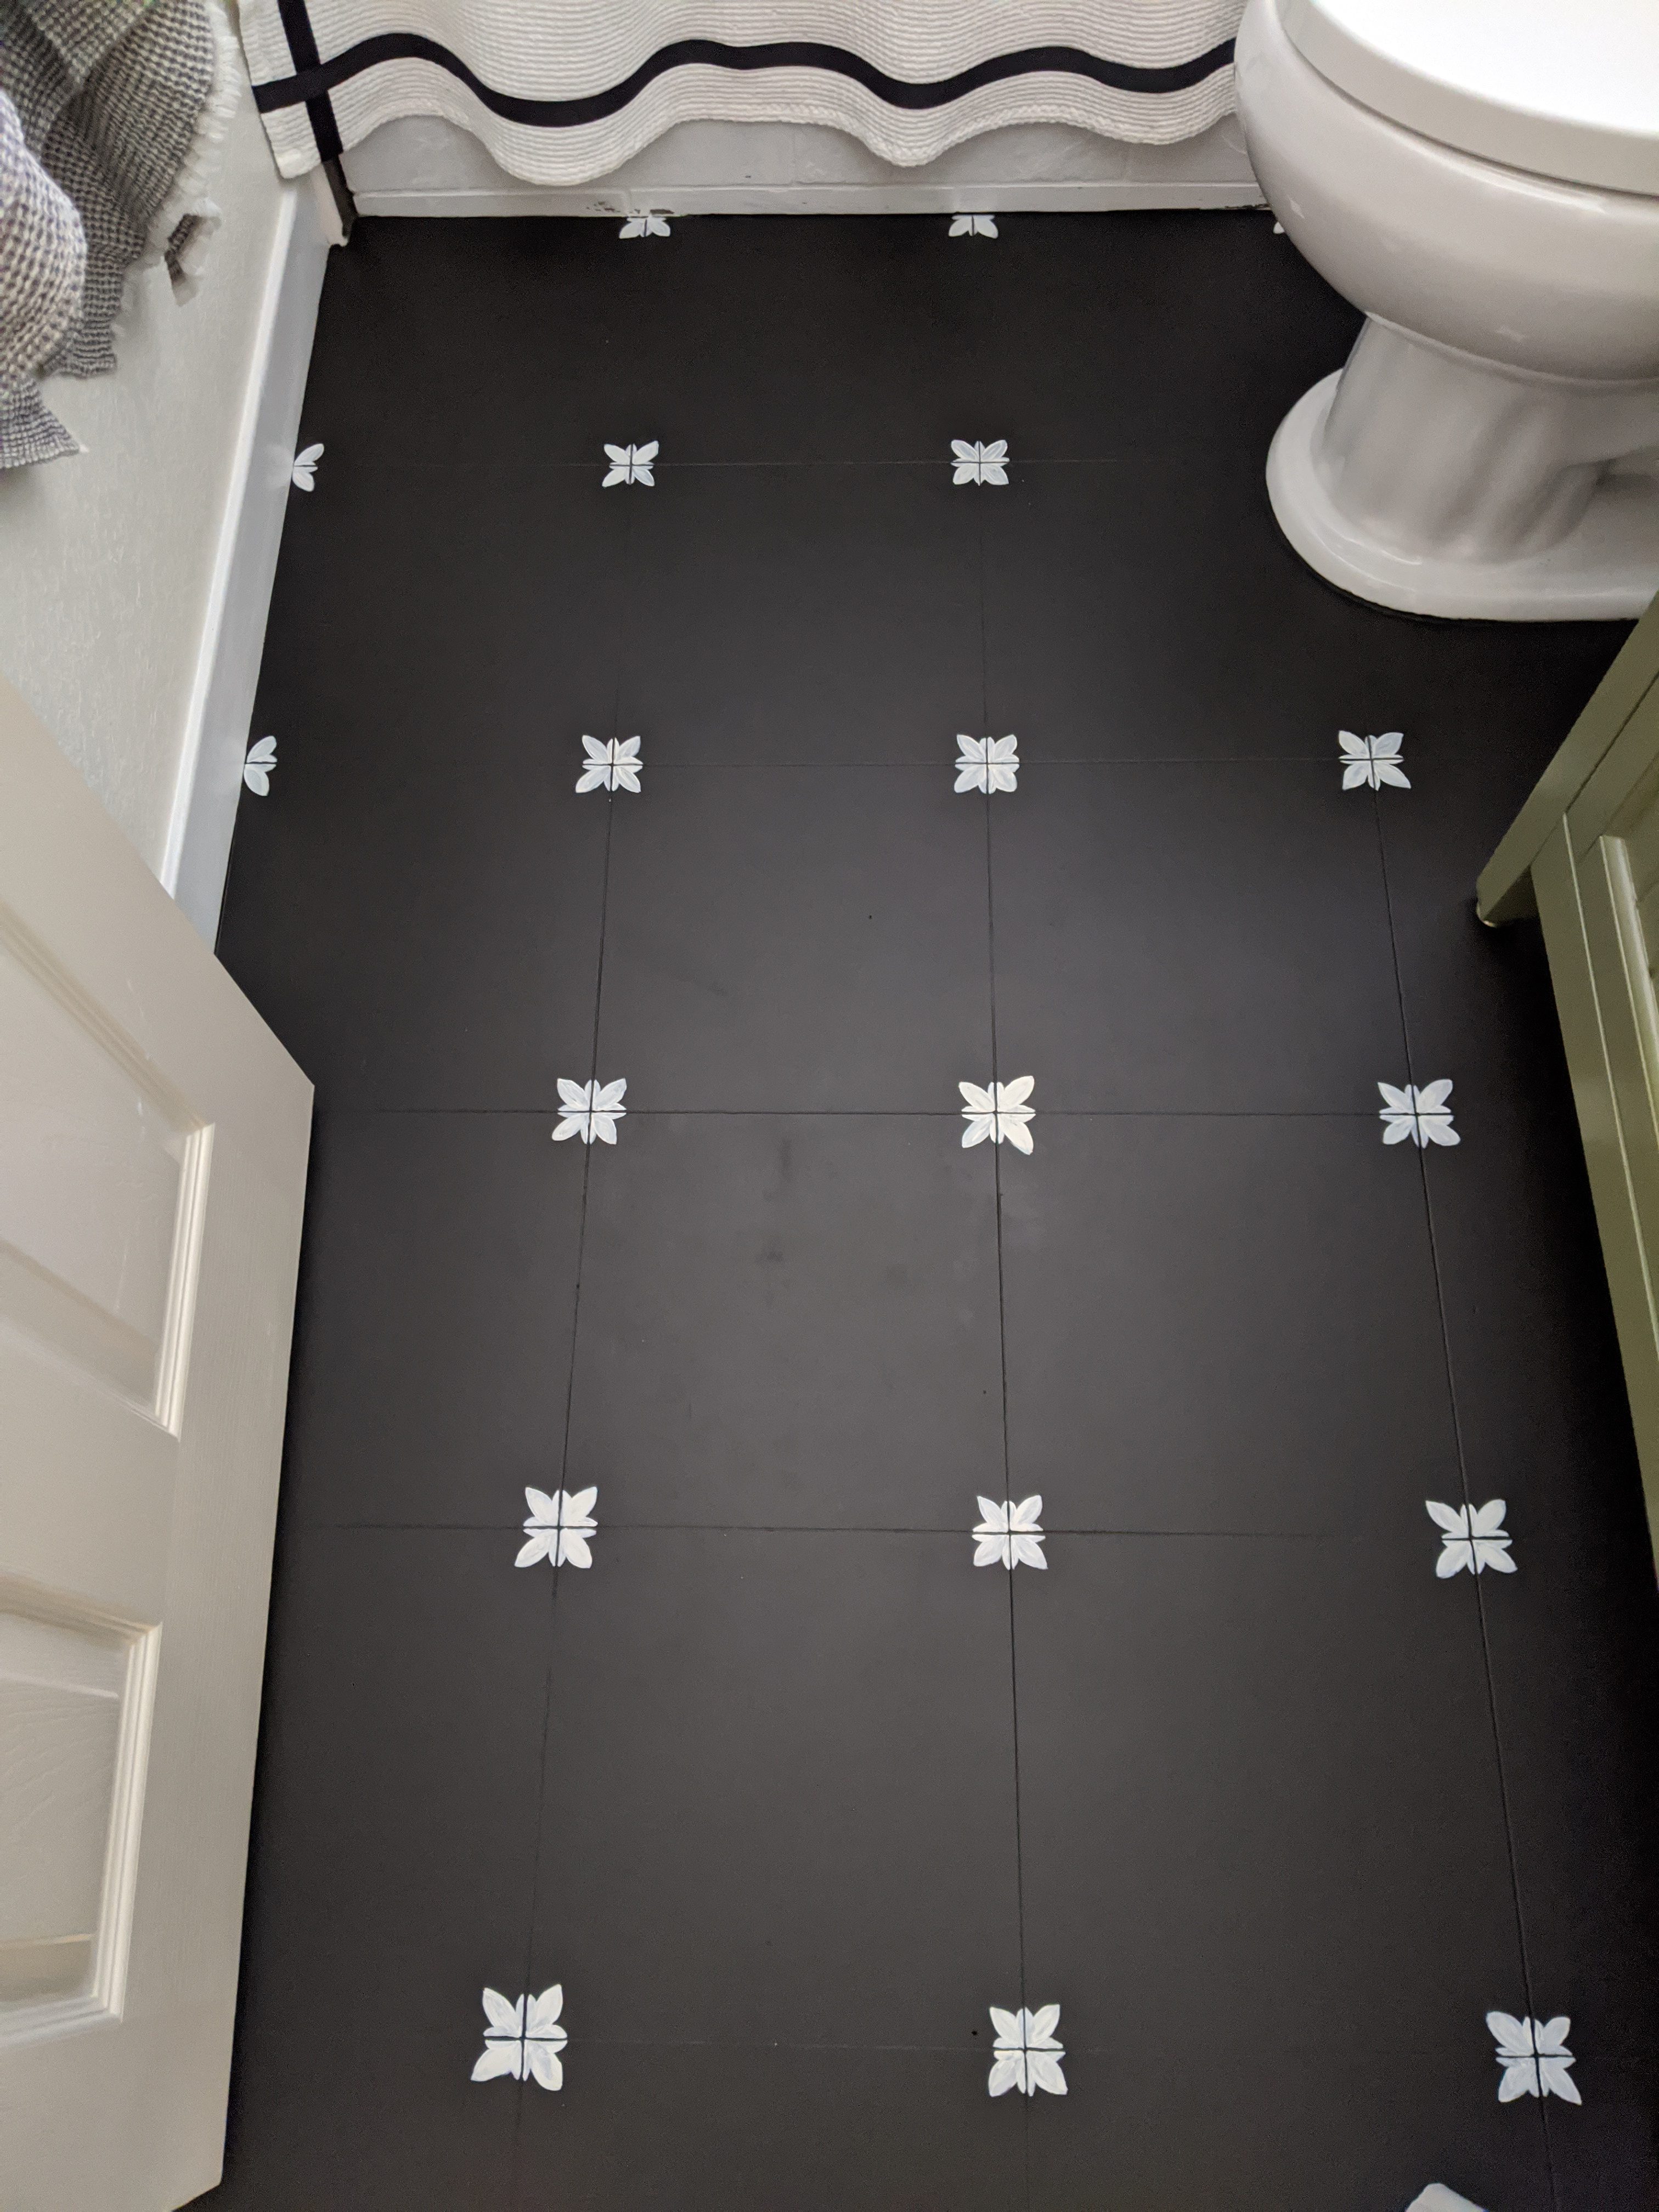
Here’s what they looked like before I took a brush to them:

I’d love to rip everything down to the studs in our guest bath and do this space up right but until then I figured a small investment (floor paint supplies cost less than $50) could hold us over a little while longer plus it’s something I’ve always wanted to try!
Here’s what you’ll need:
SUPPLIES:
- Vacuum (we have this one)
- Krud Kutter
- Microfiber Rags
- Scrub Brush
- Rustoleum Home Floor Coating Base Coat (in Black)
- Rustoleum Home Floor Coating Top Coat
- Paint Brush
- Paint Tray
- Foam Roller for Smooth Surfaces
- Painters tape
- Small Artist Brush
- Accent color for design (I used this)
PREPPING THE FLOORS
To prep the floor for paint, I made sure to vacuum the floors really well and took extra time to get into all the nooks and crannies down along the tub and baseboards.

To further prep, I used Krud Kutter and an old scrub brush to clean and degrease the floors making sure to pay extra attention to the edges and grout lines. The directions on the paint can specifically recommended this product so that’s what I went with.
I’m usually one to brush off prep steps but DO NOT SKIP THIS STEP! You absolutely must do this in order for achieve maximum paint adhesion. I skipped this step when painting our tile fireplace and it shows unfortunately.

After giving the floors a really good scrubbing – I made sure to wipe everything down with my rags and I taped off any areas I didn’t want to get paint on.
For me that was only around my toilet. I had just painted my baseboards (same as the floor tile but painted white) and tub skirt (also tile) so I didn’t want to risk peeling paint on my freshly painted surfaces by taping them off so you may have more areas to tape off than I did.

ROLLING ON THE BASE COAT
With everything prepped, cleaned, and taped off – it’s ready for paint! I documented the process pretty extensively over on my Instagram so if you want to see more behind the scene process videos of applying the paint, head over and check out my Guest Bath highlight bubble.
I didn’t snap any photos of the first coat going on but the general idea is to work in small sections, edge first, then roll that section, before moving onto the next. Be mindful to start at the top of the room and work your way out the door so you’re not reaching over any freshly painted tiles.

For the first coat I used my favorite short handled brush and a small roller with a 1/4″ nap. For the second coat I used the same brush but switched to a foam roller which I ended up preferring over the 1/4″ nap roller.
Be sure to apply even pressure when rolling so as not to create ridges on the outer edges of your paint path like the photo below. If you do, just be sure to go back and lightly roll over those areas to even it out.

After the first coat went on it looked really splotchy and I was worried for a second that I had made a huge mistake but by morning, it had dried smooth, even, and matte! Still a bit splotchy and in need of a second coat but much improved!


After applying the first coat, the directions say to wait at least 6 hrs before applying a second and before it can withstand any light foot traffic. I let mine dry a bit longer overnight just to be sure so in the morning it was ready for the second coat. I repeated the steps above and here’s how it looked right after the second coat went on and how it looked 6 hrs later when it was dry:


At this point I let it dry for nearly a full 24 hours. I did go in after the 6 hour mark just to see how it was drying and it was still a tiny bit tacky when walking on it barefoot. By the time the 24 hour mark had rolled around, most of the tackiness had gone away but not completely – just a word of caution but don’t be alarmed.
HAND PAINTING THE PATTERN
Are you ready to see the step-by-step process of how I hand painted the pattern?


- Where 4 tiles meet – create a football shaped petal on the diagonal
- Fill it in (the less paint, the better)
- Create a smaller / half football shaped leaf on one side
- Repeat on the other side being sure to trace your leaf along the edge of the tile, leaving the grout line black
Repeat these steps in the corner of each of the four tiles to complete your pattern.


A couple tips I found to be helpful and learned a long the way…
Use a small artist brush with long bristles as shown below (I borrowed mine from Emie’s art box), dip the brush in the tiniest amount of paint, and then sorta roll your brush into a point like so:

Use that point to draw your football shapes and to trace the edge along your grout line:

I found this type of brush and this technique to be more helpful and effective over a brush with a shorter boxy shaped bristle.
The end result is meant to look hand painted, show brush strokes, and every “flower” will look unique to itself but that’s OK! Don’t stress yourself over getting everything completely saturated and opaque – the more unique, the better in my opinion!

And if you get any white paint on your black grout lines, that’s OK too! Just go back over with your black paint and paint the grout lines black again. I did half the bathroom this way before realizing I preferred the flowers with the grout lines dissecting each shape so I had to go back and add them back in.


Repeat the process everywhere you have four tiles that meet until you’ve covered the entire surface! The entire process took me about 2 hours to hand paint each shape and it was definitely back breaking to be on my hands and knees for an extended period of time but I love how it turned out!

SEALING AND PROTECTING THE FLOORS
Following all the same steps as I did when I applied my base coat, the top coat goes on in the same manner. Edge first, roll second.
Before rolling on the top coat I used a wet microfiber cloth and wiped the surface area down just to be sure there wasn’t any scuffs or stray hairs that would then get stuck in the top coat. I let the floor dry completely before rolling on the top coat.
I applied the top coat on with a smooth foam roller – it goes on kinda white and bubbly but dries completely matte.

Voila! I snapped this right after I applied the top coat:

And here is what the floors looked like in the morning:

I’m so, so proud of how the floor turned out and can’t believe this project cost less than $50! Much less if you take into consideration that I still have enough paint to do at least two more bathrooms!
I think this one project single-handedly transformed the entire bathroom. See for yourself:


All the heart eyes for these floors! If you use my tutorial to try them in your own home, I’d love to see how they turn out!
13 responses to “Tutorial | Hand Painted Floor Tile”
[…] Speaking of floors, I used Rustoleum’s Home Floor Coating two part paint system to paint the peachy colored travertine tile that was here previously. The black fits so much better with our home’s aesthetic and they’ve held up fantastically through bath time and every day wear and tear. If you’re interested in tackling something similar in your own home, you can find the in depth tutorial here. […]
Your “before” tile is honed and filled travertine, a form of limestone.
I thought the before was beautiful, it is ruined now. I’m not opposed to painting things
just not beautiful things. 🙁
To each their own – that’s the beauty of home ownership! You’re allowed to have a difference of opinion of what’s beautiful to you and so am I and the tile was not something I found to be beautiful not to mention was impossible to keep clean.
[…] #2 – Hand Painted Tile Floor Tutorial […]
I had no idea about this. Pretty interesting subject for sure though.
[…] been six months (can you believe it?!) since I painted the floor tile in our guest bathroom and I still get questions about them regularly. I figured it’d be a […]
Love this!! How is it holding up?
Honestly, not well 3 years in – it’s due for an upgrade!
What color is the floor paint?
The Rustoleum floor paint comes in stock color – or you can have one tinted to whatever color you prefer – this one is their stock black color.
Wow! Beautiful! This is just what I was looking for: painted black tiled floors. I was expecting them to last about 3-5 years… enough time to save for new floors. Thank you for detailing the steps and following through on how long they last. I can’t wait to start!
But the tile was so beautiful before 😥